About

I made ScienceFix.com to share my favorite demos that I do in my middle school science classes.  

Contact Me
Search ScienceFix.com
Twitter
Delicious
Media that I like...
  • Something Funny Happened on the Way to the Moon
    Something Funny Happened on the Way to the Moon
    by Sara Howard
  • NOVA - Origins
    NOVA - Origins
    starring Neil Degrasse Tyson
  • Human Body: Pushing the Limits
    Human Body: Pushing the Limits
    starring Bray Poor
Tuesday
Jun232009

iPhone Applications for the Science Classroom

I know what you are thinking. How can an iPhone be of any educational value in the science classroom? You are right. As of this moment it’s not quite ready to improve your students’ learning, but there are some tantalizing possibilities in the near future. What features does an iPhone have that can be used in the classroom?

1. An accelerometer. You have seen commercials showing the iPhone’s screen changing when the unit’s position is changed. How does it do that? It has a built in accelerometer that detects change in position in the x, y and z axis, as well as a change in speed. Speed and direction together is velocity, and a change in velocity is acceleration. What are some apps that take advantage of the accelerometer?

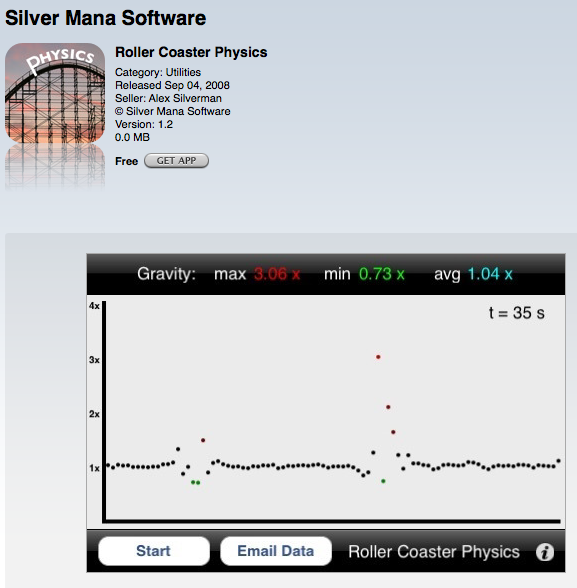
Roller Coaster Physics (Silver Mana Software) This app measures vertical g-forces. Press the start button and it will plot the vertical g-forces on the y axis and time on the x axis. This is ideally meant for a person to keep the iPhone in a pocket while riding a roller coaster. The best feature is emailing the data to yourself. The data is in comma separated value form and can easily be imported into Excel for analysis.
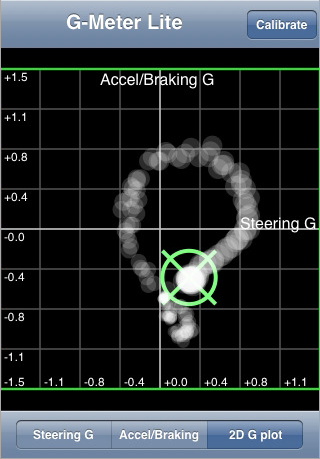
G-Meter Lite (Silverview Consulting Inc.) This app measures “steering” (left/right) g forces and accelerating/braking g forces. It plots the data points on a four quadrant graph. Unfortunately this app doesn’t save the data for use later analysis. It is merely a visual representation of real time forces, and thus it really isn’t useful for data analysis. G FORCE and G-Force are also apps that do this very same thing.
2. A microphone. The iPhone obviously has a microphone or else it couldn’t be used as a phone. What app can possibley be used in a science class that takes advantage of the microphone?

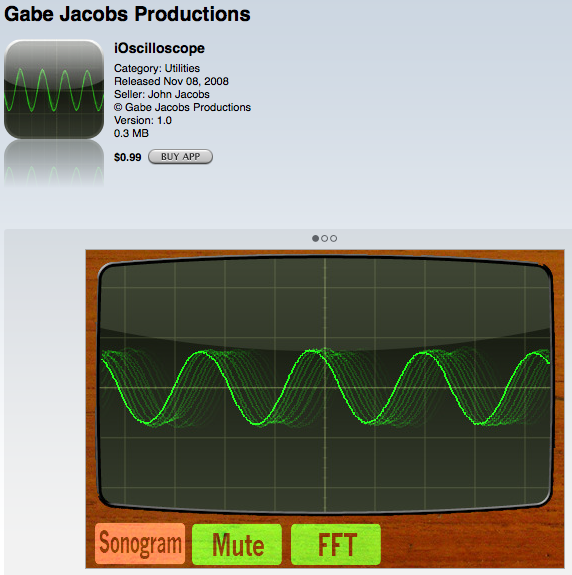
ioscilloscope (Gabe Jacobs Productions) This app shows the amplitude and wavelength of sound waves. Have a student bring in an instrument (or use prerecorded tones), like a trumpet or a sax and have the student play a single note at different volume levels to show the differences in amplitude. Then have the student play a series of higher pitched notes to show the different wavelengths (or frequencies).
3. A clock Don’t all cell phones have a clock? Yes, so the iPhone isn’t so special on this feature. Each year our science department buys 15+ stopwatches at about $6 each minimum. These are cheap stopwatches and their quality is also cheap. They don’t last more than 10-20 uses because either the battery goes dead or the buttons break. Since they don’t last more than a year they are considered consumables. This year I decided to end this cycle of spending. Most students now have cell phones and most of these cell phones have a stopwatch (timer) feature that measures to the nearest 0.01 seconds. Now when we need to measure time for learning activities I ask volunteers to use their own cell phones and the science department doesn’t have to spend any more money.

Summary It’s a little too soon to utilize a few of these iPhone apps to enhance learning in the science classroom. What is encouraging though is in probably 5 years most cell phones will be like the iPhone–a minicomputer that can collect all types of data. Today many physics and chemistry classes use expensive specialized probeware (like from Vernier and Pasco) to collect and upload data to computers. Students might bring their own data collection devices via their cell phones.

Monday
Jun222009

Handboiler

Educational Innovations’ website teachersource.com sells tons of unique science related items. One of those items is the handboiler. When you wrap your hand around the base the colored liquid (probably alcohol) heats up and moves up to the top where it eventually bubbles. My guess is that the molecules of the liquid speed up causing them to move up. When you let go the liquid eventually cools and goes back down via gravity. You can make the liquid go down faster by grabbing the top with your hand. I do this demo with student volunteers. We make observations and they hypothesize what is causing it. We also record who is able to send the liquid up the fastest.

Precautions: Don’t squeeze the handboiler. It can break easily.

Saturday
Jun202009

Video Demo: Flame Tests

Every chemical has its unique characteristic properties. These properties can include hardness, density, melting point, boiling point, color, taste, texture etc. No matter what sample you have of a pure substance they will display its characteristic properties. This is how a an unknown chemical can be identified. The properties of the unknown chemical can be compared to the properties of known chemicals. In this activity there are 3 unknown chemicals (X, Y, and Z) that are to be identified based on 5 properties: color, boiling point, melting point, density, and color when burned. This is a simple and quick lab activity. The handout has the density, boiling point, and melting point filled in already. The students must observe the color and the color when burned–a flame test. Slide 1 shows the materials needed for the activity (the 3 chemicals are copper sulfate, strontium chloride, and lithium chloride). Slide 2 shows the Bunsen burner flame with the typical blue color. Slide 3 shows the inoculating loop collecting some of chemical Y. When the different chemicals are put in the flame, they burn at different colors (Slide 4 shows copper sulfate’s green flame, and slide 5 shows lithium chloride’s red flame).

Tips: Make sure students are careful to not contaminate the tubes and to thoroughly clean loop before testing each chemical.

Safety: Make sure students wear goggles, and know how to properly use a Bunsen burner safely.

BubbleShare: Share photos - Easy Photo Sharing

This is a variation on the flame test lab. Instead of using a Bunsen burner, a denatured alcohol flame is used (the best results is achieved by using methanol). Put a spoonful of strontium chloride into a Pyrex petri dish (this glass can take the heat, any other non Pyrex glass will break). Put about 2-3 spoonfuls of denatured alcohol into the dish. Swirl around to mix. Carefully light the alcohol on fire. You will probably need to swirl it so that the strontium chloride will burn and produce the red flame (lower left image). Try this with other salts and compounds that are safe to burn and will give color (like copper sulfate–lower right image).

ultra flame test materials

ultra flame test red ultra flame test green


Precautions: ONLY TEACHER DEMO! Be sure to use only Pyrex petri dish. The dish will get very hot! Don’t let water hit it right away. Be sure to blow flame out.

Friday
Jun192009

Video Demo: Muscle Pair

Seventh graders in the state of California are required to learn how bones move. Of course bones move because skeletal muscles are attached to bones, and when they contract, they make a bone move in one direction. Muscle work in pairs and when one muscle contracts, the other relaxes. Below are two video demos that show students how the biceps/triceps muscle pair works together to move the radius/ulna.

The first video is a model of how the biceps/triceps muscle pair works. In the model the radius/ulna and the humerus are represented by meter sticks. The meter sticks meet at a point which represents the joint (in this case a hinge joint). A joint is where two bones meet. The muscles in the video are represented by white irrigation tubing. The tubing is attached to each bone via duct tape. The duct tape represents a tendon. Tendons are connective tissue that connects muscles to bone. When the irrigation tubing (muscle) contracts, gets shorter, it moves the radius/ulna in a certain direction. When one muscle contracts, the other muscle relaxes.

The second video demonstrates the triceps/biceps muscle pair at work in a chicken wing. The video demonstrates how to dissect the chicken wing and then what happens to the radius/ulna when the biceps contract and then when the triceps contract. If students do the chicken wing dissection, make sure that proper washing and disposal precautions are taken so as to prevent biocontamination. If anyone is interested in a student worksheet email me at sciencefix@gmail.com and put “chicken wing dissection handout” in the subject line. I will then send you a copy.

Thursday
Jun182009

Video Demo: Grain Silo Explosion

BubbleShare: Share photos - Easy Photo Sharing This is a very popular demo in science classes around the country. You need a coffee can with lid, candle, and irrigation tubing (slide 1). You can use cake flour, corn starch, or lycopodium powder. Put some of the substance into a petri dish. Light a match and place the flame next to the substance. The substance will brown but it won’t ignite. Place the substance into the coffee can next to the tube (use a drill to make a hole near the bottom of the can so the tube can fit). Light a candle (the best kind are the flat votive kind) and place it opposite the hole (slide 2). Put the lid on the can and make sure it is snugly fit. Take in a deep breath, then place the tube into your mouth and exhale a big breath. An small explosion will happen causing the lid to fly off. This demo demonstrates that for a substance to ignite it needs oxygen. When the substance is packed together there isn’t enough oxygen that surrounds the particles and ignition can’t occur. By blowing into the can the substance spreads apart, increasing the surface area, causing the ignition and the reaction happens very quickly.

Precautions: Wear goggles. Try this demo ahead of time to make sure it works safely. Make sure students are at a safe distance.